


How to Diagnose Old Pipe Leaks Without Wall Damage


Table of Contents
- Signs of a Hidden Plumbing Leak You Should Never Ignore
- How to Use a Water Meter to Check for Leaks
- Moisture Detectors and Acoustic Sensors for Non-Invasive Detection
- Infrared Thermal Imaging for Plumbing Inspections
- Signs of a Slab Leak and How to Confirm One
- Pressure Testing and Professional Plumbing Diagnostics
- DIY vs. Professional Leak Detection: Tools, Limits, and Safety
- Frequently Asked Questions
Last Updated: September 23, 2026
Signs of a Hidden Plumbing Leak You Should Never Ignore
Hidden pipe leaks are water escaping from a pipe behind a wall, under a slab, or beneath a floor where you cannot see it. The damage rarely stays hidden for long.
Musty Odors, Bubbling Paint, and Wall Staining
Your nose often finds a leak before your eyes do. A musty odor in one room, especially near a cabinet or closet, points to damp material behind the surface, followed by bubbling paint, wall staining, or soft drywall.
- Musty odor that never goes away, even after cleaning
- Bubbling or peeling paint on walls or ceilings
- Brown or yellow wall staining near baseboards
- Damp drywall that feels cool or spongy to the touch
- Mold growth in corners, closets, or under sinks
Water Bill Spikes and Water Discoloration
A water bill jump is one of the clearest signals of pipe leaks: if usage hasn’t changed, the water is going somewhere. Rusty or brown water can mean pipe corrosion is letting sediment and metal into your supply.
Ignoring a water bill spike for even a month can let a pinhole leak grow into a burst pipe. By then, you’re looking at emergency repairs and possible structural damage, not a simple patch.
How to Use a Water Meter to Check for Leaks
The water meter test is the most reliable DIY method for confirming a leak. It takes about 15 minutes and no tools beyond a flashlight. If every fixture is off and the meter still moves, water is escaping somewhere. It won’t tell you where, but it confirms a leak exists.
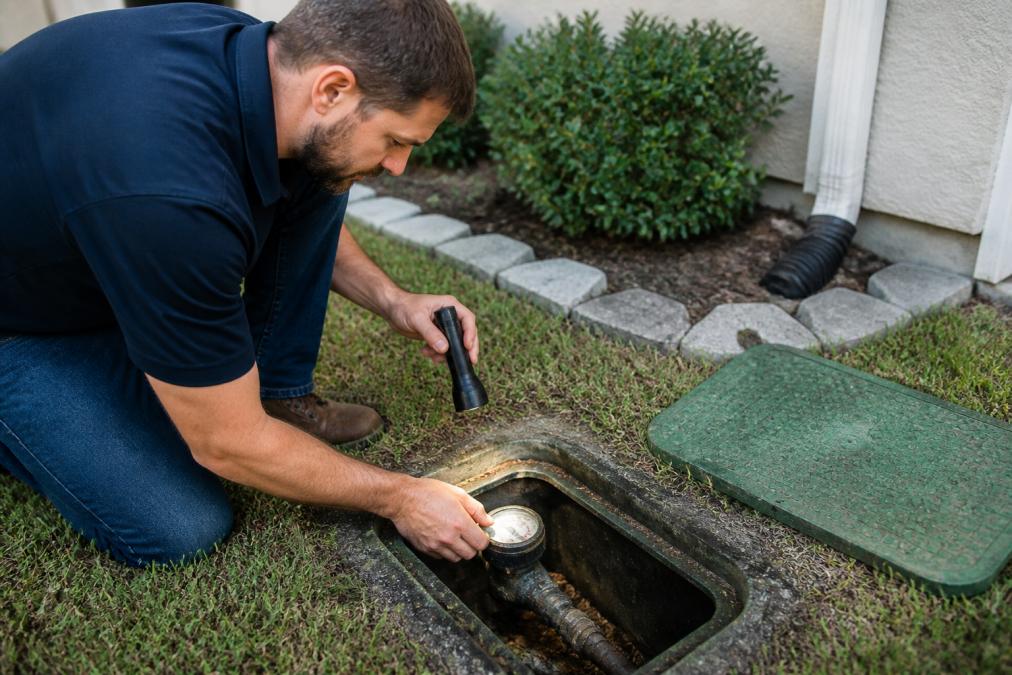
Step-by-Step Water Meter Test Protocol
Follow these steps in order for an accurate reading:
- Shut off every water source. Turn off faucets, the dishwasher, washing machine, and ice maker.
- Check for running toilets. Listen at each toilet. A running flapper will ruin the test.
- Find your water meter. It’s usually near the curb or in a utility box.
- Note the reading. Write down the number on the dial or digital display.
- Wait 30 to 60 minutes. Do not use any water during this window.
- Read the meter again. If the number changed, you have a leak.
- Locate the shutoff valve. Turn off the main valve and repeat the test to isolate supply line leaks.
If the meter stops when the main valve is closed, the leak is inside your home. If it keeps moving, the leak is in the water supply line outside.
Moisture Detectors and Acoustic Sensors for Non-Invasive Detection
A moisture detector finds water where you can’t see it, measuring dampness in drywall, wood, and concrete by reading electrical conductivity, wet material conducts more current than dry material. Acoustic sensors go further: a pinhole leak under pressure produces a high-frequency hiss a contact microphone can pick up through drywall, tile, or a few inches of concrete.
How Moisture Meters Actually Work
- Pin-type meters drive two metal probes into the surface and measure resistance between them. They read drywall and bare wood accurately but leave two small puncture marks, so use them on surfaces you plan to repair anyway.
- Pinless (capacitive) meters send a low-frequency signal into the material and read the dielectric constant. They scan tile, concrete, and finished walls without poking holes, but readings are relative, wetter than surrounding material, not an exact moisture percentage.
- Reference scale, not a verdict. Most pin-type meters read 0-100 on an arbitrary scale, not percent moisture content. A reading of 20 on drywall is a red flag; the same number on concrete may be normal. Always compare the suspect spot to a known-dry area of the same material.
A common mistake is trusting a budget moisture meter on tile. Most low-cost models can’t penetrate dense materials, so the reading stays flat even over a soaked substrate. For tile and thick concrete, use a pinless model rated for deep scanning and confirm any hit with a second method.
Acoustic and Ultrasonic Listening
Acoustic leak detection works on a simple principle: pressurized water escaping a pipe creates a continuous sound signature. A contact microphone placed against the wall, floor, or pipe reveals the loudest point through headphones.
- Ground microphones pick up leak noise through soil and slab, useful for supply lines running under a foundation.
- Contact microphones clamp or press directly onto a pipe or wall surface for the cleanest signal.
- Ultrasonic detectors shift the frequency of the leak noise into the audible range, which helps isolate small pinhole leaks that a standard microphone misses.
Safety Precautions for Non-Invasive Inspection
Before pressing any meter or sensor against a wall, know what’s behind it.
- Never probe near outlets, switches, or recessed lighting. A pin-type meter’s probes are metal, and drywall around an electrical box may hide live wiring. Shut off the breaker before probing within a foot of an electrical device.
- Watch for wet electrical boxes. If a moisture meter reads high around an outlet, do not touch the outlet or its cover. Water plus live wiring is a shock hazard. Kill power at the panel first.
- Avoid drilling or probing near gas lines and HVAC refrigerant lines. These run through the same wall cavities as plumbing in many homes.
- Treat any reading near a panel or meter base as a call-the-electrician situation, not a plumbing one, until power is confirmed off.
A moisture meter that reads wet near an electrical outlet is a signal to stop, not to investigate further with your hands. Cut power at the breaker before you go any closer.
Matching the Tool to the Surface
| Surface | Best First Tool | Why |
|---|---|---|
| Painted drywall | Pin-type meter | Accurate, cheap, minor holes are easy to patch |
| Ceramic tile | Pinless meter | Reads through the tile without cracking it |
| Concrete slab | Pinless meter + acoustic | Capacitive scan finds the wet zone; acoustic pinpoints the pipe |
| Finished wood floor | Pinless meter | Avoids visible pin marks on a finished surface |
| Behind a cabinet | Pin-type meter | Tight space, surface will be hidden anyway |
Start with the least invasive tool that answers your question. A pinless scan narrows the search area; a pin-type reading confirms the wet spot; acoustic listening tells you whether the source is a pipe. Only after those three agree should you open the wall.
Infrared Thermal Imaging for Plumbing Inspections
Infrared thermal imaging for plumbing uses a camera that reads surface temperature. Leaking water changes the temperature of the material around it, so the camera shows a cold or warm spot where the leak hides, scanning an entire wall in seconds without cutting a single hole.
Plumbers use thermal imaging to check:
- Hot water line leaks, which show as warm streaks
- Cold water leaks, which appear as cool patches
- Sub-slab leaks under tile or concrete
- Moisture mapping across a whole room
Signs of a Slab Leak and How to Confirm One
A slab leak is water escaping from a pipe beneath your home’s concrete foundation. With nowhere to drain, it soaks into the soil and can shift your foundation, watch for warm spots on the floor, running water sounds when nothing is on, and cracks in the foundation or tile.
Watch for these red flags:
- Warm spots on the floor, even when the heat is off
- Cracks in tile, baseboards, or the slab itself
- The sound of running water with all fixtures off
- A water bill spike with no visible cause
- Damp carpet or buckling flooring in one area
Pressure Testing and Professional Plumbing Diagnostics
Pressure testing confirms a leak and narrows its location. A plumber connects a pressure gauge, isolates sections, and watches for a drop. A static pressure test can isolate a single branch of pipe, so the plumber knows which wall or slab section holds the leak before any cutting starts.
Professional plumbing diagnostics combine several tools:
- Pressure gauges for static pressure tests
- Acoustic sensors for pinpointing the leak’s sound
- Infrared cameras for moisture mapping
- Video inspection for pipes that can be reached with a camera
DIY vs. Professional Leak Detection: Tools, Limits, and Safety
You can confirm a leak yourself with a water meter and a moisture meter. Pinpointing it inside a wall or under a slab usually takes pro-grade tools and the training to interpret them.
What You Can Realistically Do Yourself
- Water meter test, free, no tools, confirms a leak exists. This is the single highest-value DIY step.
- Toilet dye test, drop dye in the tank, wait 15 minutes, check the bowl. A running flapper is the most common false alarm for a “hidden” leak.
- Pin-type moisture meter, a $30-$80 tool that finds wet drywall and wood. Good enough to map a suspect zone.
- Pinless moisture meter, $50-$150, reads through tile and concrete without damage. Worth owning if you have tile floors or a slab.
- Visual inspection, bubbling paint, staining, musty odor, and soft drywall are free diagnostics that narrow the search.
What Requires a Professional
- Infrared thermal camera, a calibrated unit runs $300-$1,000+, and interpreting a thermal image requires knowing how emissivity, reflection, and ambient temperature distort the picture. A cheap phone attachment often produces misleading hot/cold spots.
- Acoustic and ultrasonic leak detection, the gear is one part; the trained ear is the other. Pros distinguish a leak hiss from water running in a drain line, HVAC condensate, or a neighbor’s plumbing.
- Static pressure test, isolates a single branch of pipe by pressurizing it and watching a gauge. Requires a test rig, a gauge rated for the system pressure, and the knowledge to bleed air out first.
- Slab leak confirmation, combines pressure testing with thermal and acoustic mapping. Misdiagnosing a slab leak leads to unnecessary concrete demolition.
- Video pipe inspection, a sewer or drain camera can’t see inside a pressurized supply line, but it can rule out drain leaks that mimic supply leaks.
The Certification Question
Not every tool requires a license to own, but several require one to use professionally, and some require certification to interpret correctly.
- Thermal imaging, Level I, II, and III certifications exist through infrared training organizations. A Level I thermographer knows how to set emissivity and avoid reflective errors; an uncertified user often doesn’t.
- Backflow testing, many states require a certified backflow prevention assembly tester to perform and document the test.
- Plumbing licensure, most states require a licensed plumber to repair potable water systems. Diagnosis is often unregulated, but the repair that follows is not.
Safety Comes First
Non-invasive inspection still carries real hazards. The two biggest are electrical shock and hidden gas lines.
- Kill power before probing near outlets, switches, or recessed lights. A pin-type meter’s probes are conductive, and drywall around an electrical box can hide live wiring.
- Never drill or probe into a wall without knowing what’s behind it. Use a stud finder with AC detection, or a thermal camera, to locate wiring and pipes first.
- Treat a wet electrical box as an emergency. If a moisture meter reads high around an outlet, do not touch the outlet. Shut off the breaker and call an electrician before a plumber.
- Watch for gas lines. In many homes, gas and water run through the same wall cavities. A pinhole in a gas line is a life-safety issue, not a plumbing repair.
- Ventilate when using any aerosol or spray sealant. Some DIY leak-seal products release fumes that are harmful in enclosed spaces.
Before you call anyone, photograph your water meter reading and your last two water bills. A plumber can often tell from those two things whether you’re dealing with a slow leak or a fast one, which speeds up the whole visit.
When the DIY Path Stops Making Sense
Stop and call a professional when:
- The water meter test confirms a leak but no moisture meter reading points to a location.
- You find a wet spot but can’t tell if it’s a supply leak, a drain leak, or condensation.
- The leak is under a slab, behind tile, or in a wall with electrical wiring.
- Your home has pipes over 30 years old.
- You’ve already opened one wall and found nothing. Exploratory demolition gets expensive fast; a pro with thermal and acoustic gear can often avoid the second hole.
The goal of DIY diagnosis isn’t to fix the leak yourself. It’s to confirm a leak exists, narrow the search area, and hand a professional enough information to make the repair a small, targeted job instead of a full-wall tear-out.
Frequently Asked Questions
What are the early warning signs of a hidden pipe leak?
Early signs include a musty odor in rooms with no visible water, bubbling or peeling paint on walls and ceilings, unexplained water bill spikes, and discolored water from taps. You may also notice damp drywall, wall staining, or the sound of running water when all fixtures are off. Catching these signs early limits structural damage and mold growth. If you spot two or more, run a water meter test before calling a plumber.
Can a plumber find a leak behind a wall without breaking it?
Yes. Plumbers use non-invasive detection tools like acoustic sensors, infrared cameras, and pressure gauges to locate hidden plumbing leaks without opening walls. Acoustic sensors pick up the sound of pressurized water escaping a pinhole leak. Infrared thermal imaging for plumbing reveals temperature differences caused by moisture behind drywall. These methods narrow down the leak location so any wall opening is small and targeted, not exploratory.
Can a water meter test confirm a hidden leak?
A water meter test confirms whether water is flowing when it should not be. Shut off every fixture and appliance that uses water, then watch the meter’s leak indicator or low-flow dial. If it moves, you have a hidden plumbing leak somewhere on the supply line. The test does not pinpoint the location, but it tells you whether to keep investigating or call a professional for leak isolation.
How do I tell the difference between condensation and a pipe leak?
Dry the area completely, then place a paper towel or dry cloth against the surface for a few hours. Condensation leaves the material evenly damp and reappears mostly in humid conditions or on cold pipes. A pipe leak often shows as a concentrated wet spot, drip line, or wall staining that keeps returning regardless of humidity. Pipe sweating on copper lines is common in coastal Florida homes and is often mistaken for a leak.